Basic Web Page
For
our example, we will make a fictional company called Magnum Kinetics, which
makes wheels. We will construct a basic web page using our HTML tags. Then, we
will buff it up with some formatting tricks called CSS. Finally, we will install a
background and some official linkage to make it professional. When we are done,
you will see how simple HTML really is.
If
you want to see our finished website right now, go to http://www.magnumkinetics.com.
As you examine this, keep in mind that you can substitute your own content into this
structure to make your own website.
We
will start with the basic structure we discussed earlier. The first section of
the file is our <HEAD>, which includes the various <META>
tags. The second section is our <BODY>, which includes the displayable
content.
Note the various attributes which modify the
<TABLE>, <TR>, and <TD> tags. These attributes of
width, cellspacing, and align define the dimensions and placement of the table elements in
our web page. Also note the <IMG> tag which defines a floating JPEG image
around which the text can wrap.
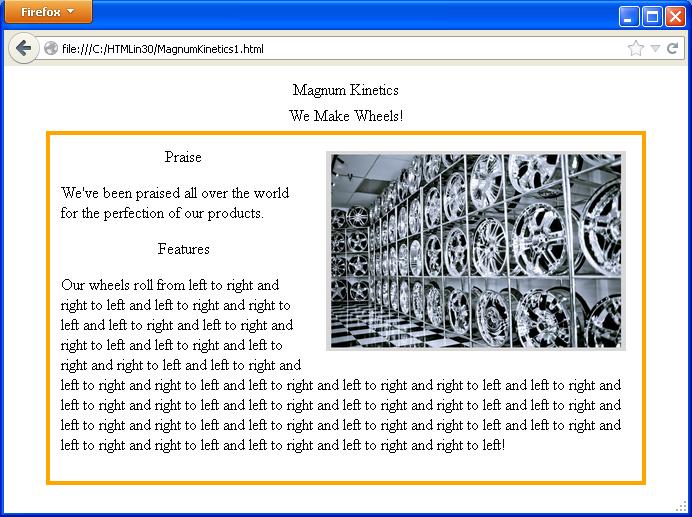
Here is the resulting web page:
Using CSS
In 1990, our
simple website was state-of-the art. Today, though, it is
primitive. It needs style. However, you dont want to have to
define the font-face and everything else in every element you create.
The trick is to define a particular style in one place so you can use it everywhere just
by referring to its name. We call this trick Cascading Style Sheets,
or CSS.
Dont
be intimidated. Your CSS file is just another file into which you will type
some instructions. By including it in your HTML file
(which we'll show you how), you will be able to
apply all your styles eveywhere.
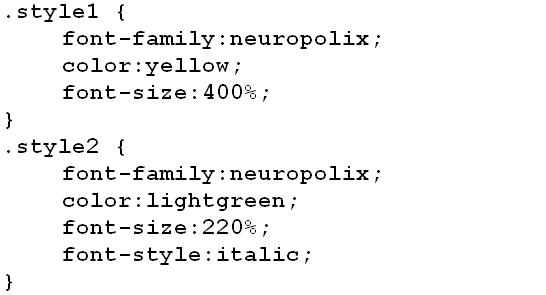
Here
is an example of a font style you would type into your CSS file:
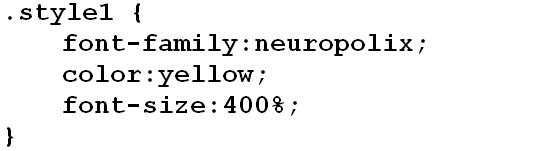
In this example, you are defining
a style called style1, which includes
the font-family, font-size, and color, though
there could be many other attributes as well.
You need to preface your style name with a period . to indicate
that it is a class with global scope. (Dont worry about global versus local
scope; just remember the period).
In
case you were wondering about the font-family, you should be advised that it would be
defined in another browser-specific CSS file.
By browser-specific, we mean that different browsers (Chrome, Internet Explorer, etc.)
use different inputs to do the same thing.
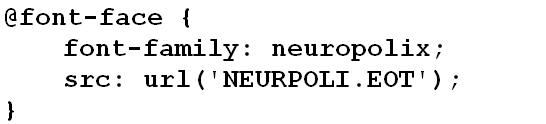
For instance, FireFox uses TrueType (TTF) fonts while Internet Explorer uses Embedded OpenType
(EOT) fonts. Therefore, you have to define the font-family resources in
different CSS files for FireFox and Internet Explorer.
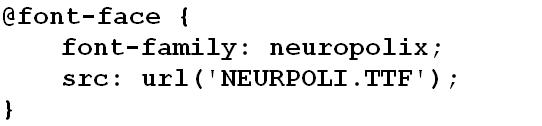
Say you want to use the odd font of Neuropolix.
Since this font is generally
accessible only via its font files, you will have to define these differently via the
src attribute.
To use neuropolix for FireFox:
To use neuropolix for Internet Explorer:
You will end up with
several CSS files, which you may name whatever you
wish. You will have a common file called, for example, HTML30_ALL.css, and
several browser-specific files, called HTML30_FFX.css (for FireFox) and HTML30_IE.css
(for Internet Explorer).
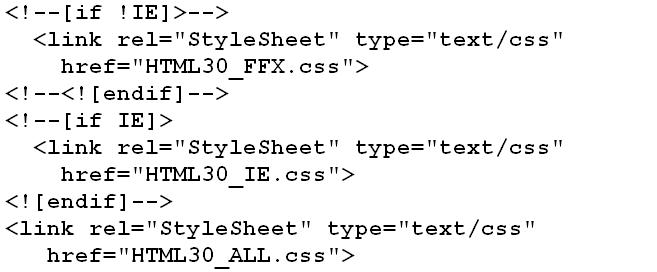
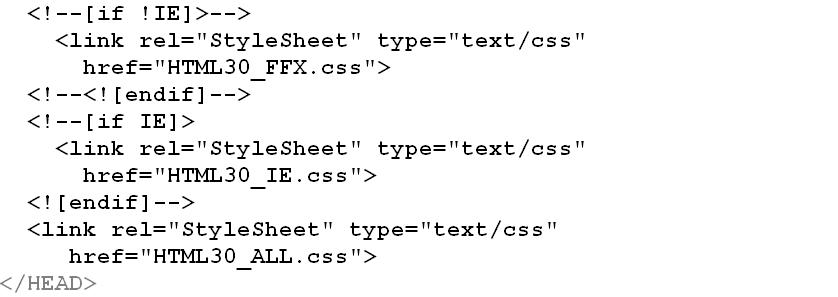
To get different browsers to play nice with your website,
you will include these CSS files conditionally, so that your web page will conform to different
browsers requirements.
Add this section of HTML code to your <HEAD> section.
As you do so, note how
it looks for the presence of Internet Explorer (IE) to determine which file to use,
while the default CSS file is added at the end:
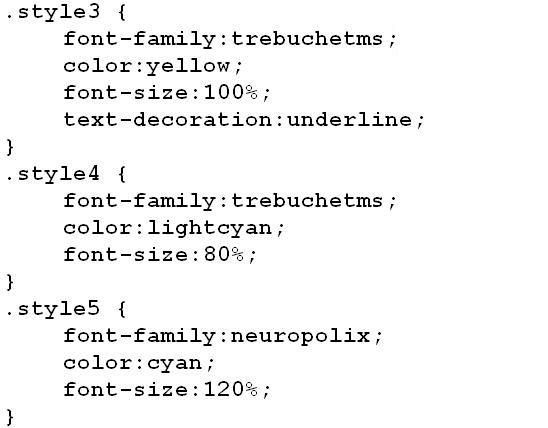
Here
is our website's complete CSS file HTML30_ALL.css:
Here is the FireFox CSS file HTML30_FFX.css:
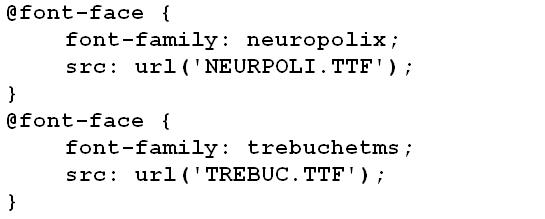
Here is the Internet Explorer CSS file HTML30_IE.css:

To assign a formatting style to an element in your website,
you must assign the name of your style (minus the period) to its tag's class attribute,
like this:

Here is the complete HTML file:

Here is the resulting website: